Publishing with Github Actions
Continuous integration and deployment has now become a well established practice in software companies of all sizes. With the advent of platforms like Gitlab CI and more recently Github Actions setting up CI/CD even for small personal projects has become quick and easy.
“Actions” is the name of the platform now actively developed and promoted by Github. It’s lightweight and remarkably simple to work with, requiring no infrastructure of our own.
In this post we’re going to create a setup which allows us to publish a static blog using Python, Actions, an AWS S3 bucket, and finally serve the contents of this bucket with Cloudflare’s CDN.
This post assumes you’re already using a static site generator such as Pelican to build your website.
There are plenty of tutorials floating around the Internet covering this topic so we’re going to skip that bit here.
The Actions job setup
The entire job description resides in a single YAML file.
In our case this will live in our git repo under .github/workflows/python-app.yml.
This might look intimidating at first but will become obvious once we dive in.
name: Publish blog

on:
  push:
    branches: [ master ]

jobs:
  build:
    runs-on: ubuntu-18.04
    steps: ...
This starts with the git events (or hooks) which will trigger the job run.
Another useful event, if you’re working within a team, is pull_request.
Here we’re only dealing with pushing to the master branch.
The job is called simply “build” and specifies which Linux distribution to run on.
Here I pinned Ubuntu to version 18.04 LTS but ubuntu-latest is a good default.
Running jobs on Windows and Mac is also an option with Github, one which I haven’t tried yet.
steps:
- uses: actions/checkout@v2
- name: Setup Python 3.8
  uses: actions/setup-python@v2
  with:
    python-version: 3.8
- name: Install Dependencies with Pip
  run: |
    python -m pip install --upgrade pip
    if [ -f requirements.txt ]; then pip install -r requirements.txt; fi
    pip install awscli
...
This clones the git repository into a fresh Ubuntu environment and sets up Python 3.8.
All actions that look like actions/* are first-party scripts offered by Github to ease our work.
Next it installs our application’s dependencies with pip. Additionally it’s going to pull in awscli as well. We’re going to use it shortly.
And on to the final part of the spec file:
...
- name: Make Publish
  run: |
    make publish
- name: Sync S3
  env:
    AWS_S3_BUCKET: ${{ secrets.AWS_S3_BUCKET }}
    AWS_ACCESS_KEY_ID: ${{ secrets.AWS_ACCESS_KEY_ID }}
    AWS_SECRET_ACCESS_KEY: ${{ secrets.AWS_SECRET_ACCESS_KEY }}
    AWS_REGION: 'us-east-1'
    SOURCE_DIR: 'output'
  run: |
    aws s3 sync --acl public-read --delete $SOURCE_DIR s3://$AWS_S3_BUCKET
“Make Publish” is the default command used by Pelican to build the website. The result will be written to the output/ folder as a series of HTML files and other assets put together by the building process.
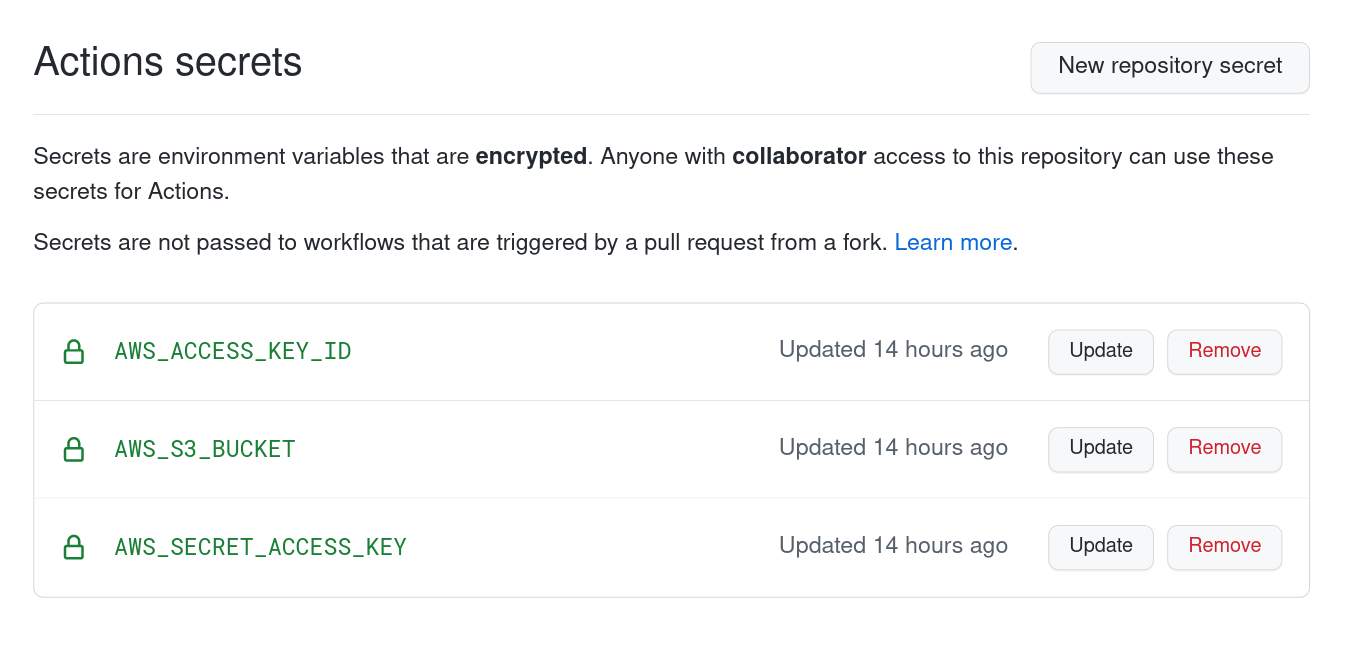
The S3 Sync is the interesting bit which synchronises the contents of our output folder to an AWS S3 bucket. A bunch of environment variables are defined here which are read from the repo’s secrets section. This can be found in your repository’s Settings → Secrets section.
It’s easy to configure and ensures we don’t leak any secrets into our code.
The run command does the synchronisation itself between the local output folder and the remote S3 bucket. It also makes sure that the files are set to be publicly readable and that any extraneous files found on the remote are deleted.
AWS has good documentation for all this stuff which I’d recommend looking over.
The complete Github workflow file can be found here — build-blog.yml.
The S3 bucket
I’m not going to cover the S3 bucket setup in detail, but what I would recommend is having a separate IAM Role with access restricted to buckets only. You’ll then have to feed the access-key-id and the secret-access-key obtained during the creation of this role into the Github secrets page.
The bucket also needs to be configured to serve a static website, this can be easily done with the AWS CLI tools:
aws s3 website s3://my-bucket/ --index-document index.html \
    --error-document 404.html
It only has to be done once so it can be left out of the job spec.
You will need to know the public URL of your bucket for the next step. It will look similar to:
http://bucket-name.s3-website-region.amazonaws.com/
The bucket needs to have the same name as your domain, including the TLD, e.g. wooptoo.com
Cloudflare
Cloudflare offers a robust CDN and DNS service which will serve these files to a large audience with ease. The service has a free tier for personal use — which is more than enough for our application. This post assumes your site’s DNS is with Cloudflare.
If you’re hosting the website on the root domain like I do then you’ll need a DNS record pointing from that root domain to the bucket’s public URL. In Cloudflare’s web UI this can easily be done with a CNAME record.

For this to work Cloudflare employs a trick. It knows that this is a special record and it applies CNAME flattening — which basically means resolving the bucket’s A/AAAA records first and then pointing your own domain’s records to the resulting IP. It might sound complicated but it works very well in practice. Other DNS services such as AWS Route53 behave similarly with Aliases. This can then be easily tested from the command line:
host -t A -v wooptoo.com

;; ANSWER SECTION:
wooptoo.com.        96  IN  A   172.67.133.56
wooptoo.com.        96  IN  A   104.21.5.86
Note that those IP addresses actually belong to Cloudflare. I assume CF proxies the requests through its own servers in order to provide caching and DoS protection for the underlying resource.
Wrap-up
Every push to the repository master branch will now trigger a build with Github Actions. The output of that build is the static website which will sync to an S3 bucket and then get served with Cloudflare’s CDN.
This is an easy and flexible setup which allows writing blog posts even from your mobile phone, pushing to the repository and letting Github handle the rest. All this without having to manage server instances yourself and the associated trouble.
Update
Since posting this, the blog has been moved to Cloudflare Pages which simplifies deployment significantly for static websites. Give it a try.